We have been using ManageEngine’s AD Self Service Plus for years at work. It’s a great tool for a BYOD environment which reminds user of expiring passwords and allows resetting / unlocking expired passwords.
After recently reading this great How-To about how to set up a Raspberry PI SMS Server, I thought to myself this was a great addition to our AD Self Service Plus Tool.
So here’s how to do it :
Notice
I strongly recommend using SSL for playsms Webservices, to keep your username and token safe! Please see this post on how to enable SSL for playsmsIn playsms, first create a standard user and enable Web Services for that user in “User Configuration“:
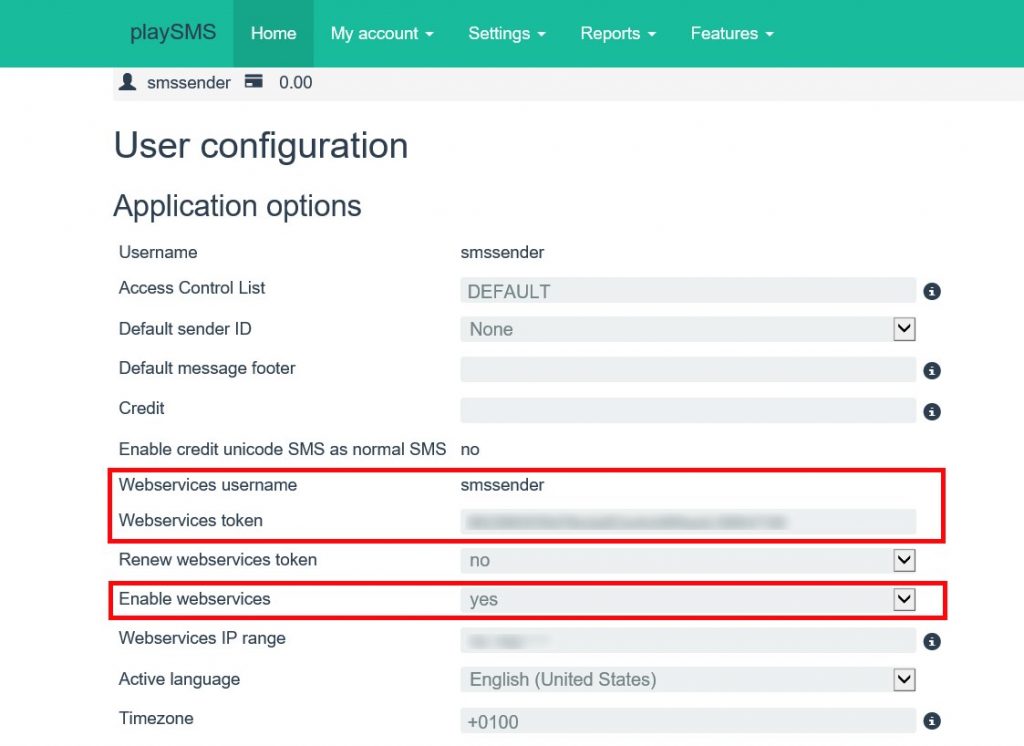
Take note of the username and token, you’re going to need it later.
Warning!
Make sure your users can add / change their mobile phone number in AD Self Service + (or have it correctly stored in your AD)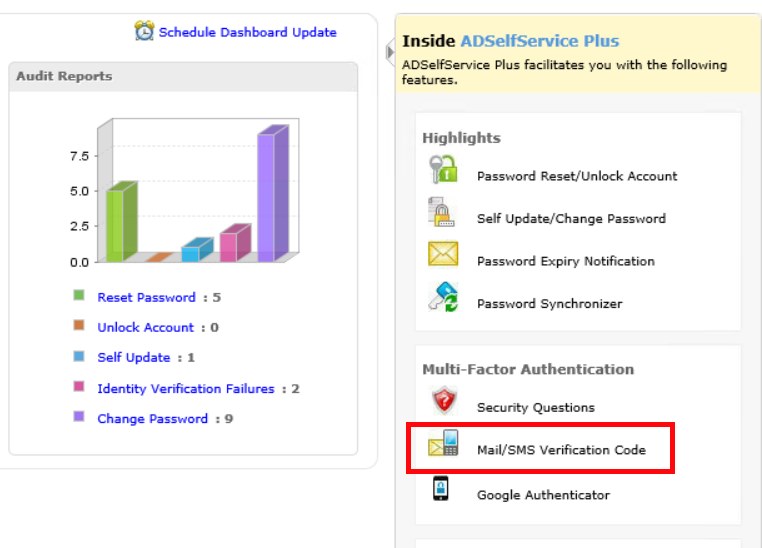
AD Self Service + Dashboard Link.
In the “Multi-Factor Authentication” Page, on the “Verification Code” Tab, make sure that following services are enabled:
- Enable Verification Code (should already be active if you’re using the Self Service…)
- Mobile Number, and set a message that will be sent via SMS. Do not forget to includ %confirmCode% , which is the variable containing the verification code
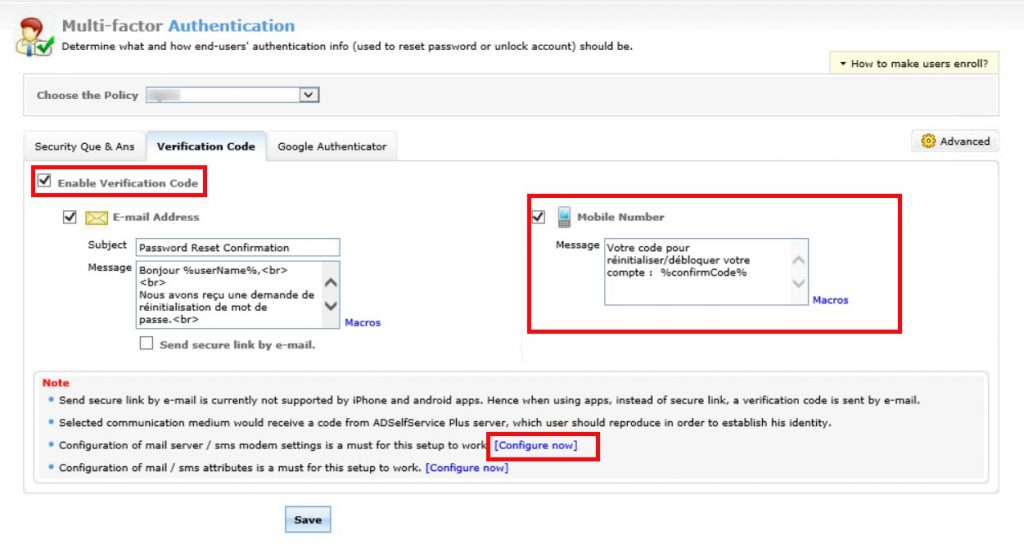
In the lower part of this page is a link at the end of “Configuration of mail server / sms modem settings” which brings you directly to the SMS gateway settings.
In the Server Settings, on the SMS Settings tab, make sure to select the following :
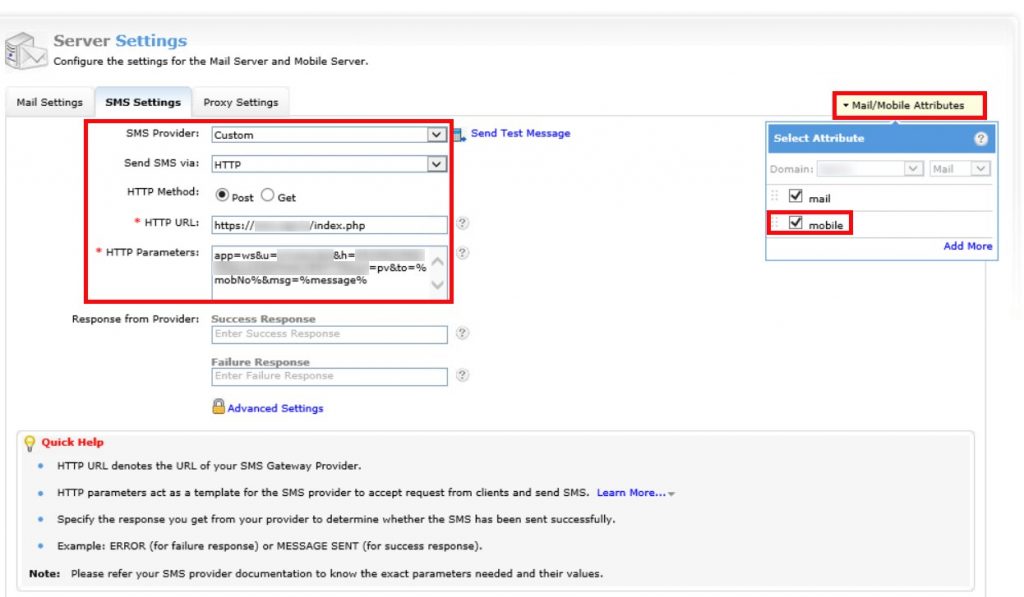
No need to fill in Response from Provider, as smsplay will return JSON Code that AD Self Service Plus doesn’t recognize. If you know why, please share your thoughts in the comments.
Warning!
Also, do not forget to add the AD Attribute “mobile” in the Mail/Mobile Attributes field (in the top right corner), or else AD Self Service + will fail in retrieving the user’s mobile phone number from the Active Directory.When using the system, users will have the choice :
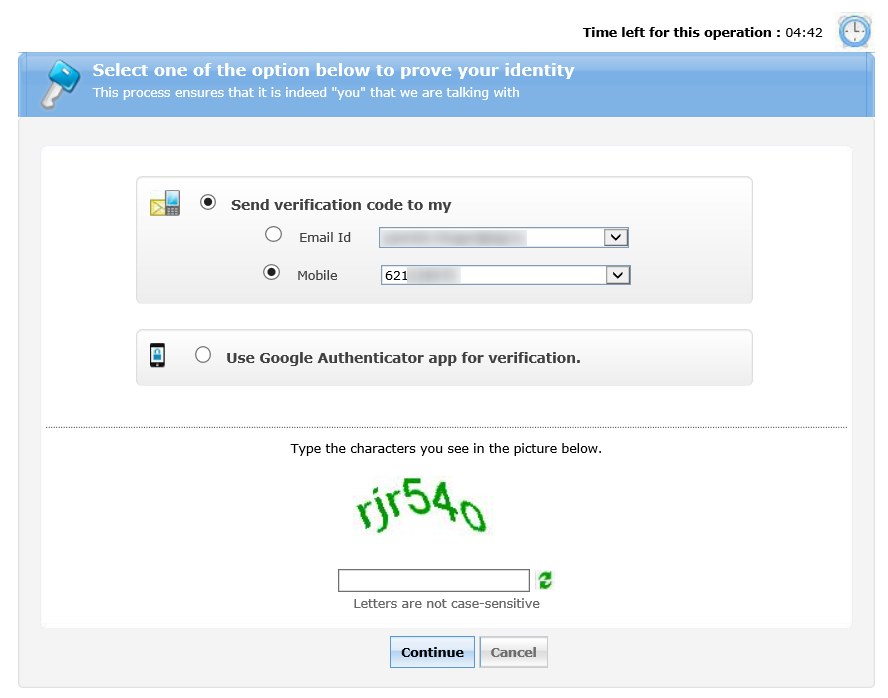
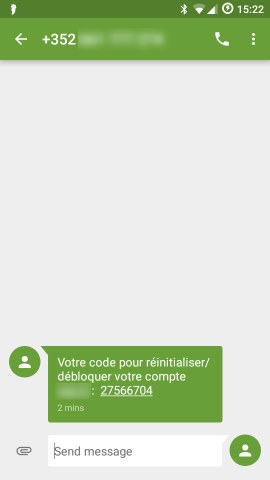
The code is being sent via SMS :




Rezent Kommentare