This howto describes a quick way to setup a safe and secure Internet Only Console, useful for public places. Additionally there is a web content filtering for preventing unwanted access to adult sites or other harmful sites. Access is very restricted, only firefox is available with no possibility to close it or change it’s settings.
The client workstation (aka Internet only Console) does not need any Hard Drive or Optical Drive, as it boots its System over Network. We do not need HighEnd Servers or Workstations, old PC’s can be used without problem. (I’ve used a Pentium 4 2GHz with 1GB Ram and a Hard Drive of 10GB as a Server to serve ~ 4 Clients, a typical client config was : Pentium 4 2GHZ with 256MB Ram and no Hard Drive)
Basic Linux skills are required, as i will not describe step by step on how to change an IP adress of a NIC.
What we need :
Server
- For own Server- OS min 256 MB, pro client 64MB suppl. , Hard Drive 10GB
- 2 NIC’s (primary=internet , secondary = lan used for PXE-booting the clients
Client
- No HD, DVD Floppy
- NIC able with PXE-Boot
Software Used:
- LTSP 5
- Ubuntu 8.04 alternate (<- alternate version includes LTSP-ready packages)
- Firefox with
- Pessulus (Gnome LockDown editor)
- Dansguardian (Proxy & Web Content Filter)
Installation of LTSP :
With the Hardy Heron (8.04) release the LTSP installer functionallity developed in edubuntu was moved to the Ubuntu alternate CD . All future releases follow this format
The installer will set up an out of the box working LTSP install for you if your server has two network cards built in. If that is not the case it will tell you what to modify to run with a single network card.
Once you boot up the CD, hit F4. The “Modes” menu will pop up. Select “Install an LTSP Server”. Now just move on with the install.
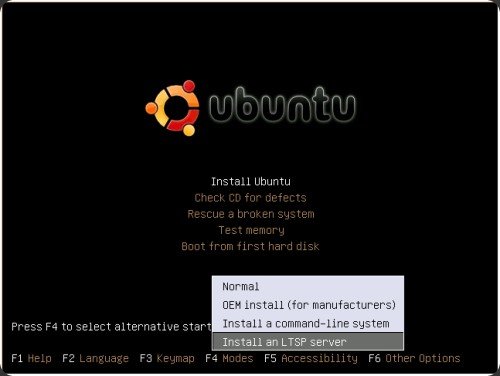
Fig. 1 Ubuntu LTSP Server Install
Towards the end of the install the installer will start to build the client environment from the packages on the CD.
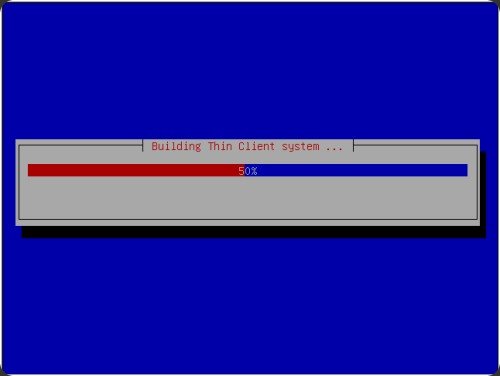
Fig. 2 Ubuntu LTSP Server Install
Which then will be compressed into an image…
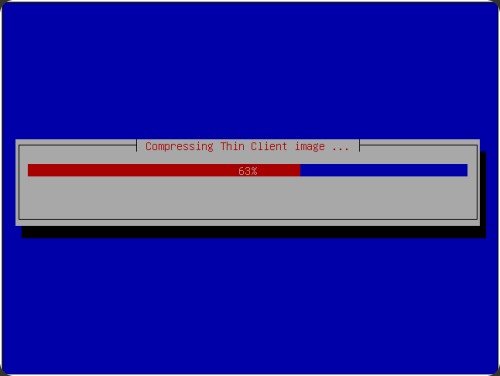
Fig. 3 Ubuntu LTSP Server Install
If the installer is done and has rebooted into your new system you will be able to boot your first Thin Client right away.
Installing on top of an already running desktop system
You need to set up one static network interface where you will attach the thin clients, install two packages and run one command.
Configure your spare interface for the thin clients to have the IP 192.168.0.1 (and make sure it is up and running), then follow the instructions below.
sudo apt-get install ltsp-server-standalone openssh-server
Now create your Thin Client environment on the server with.
sudo ltsp-build-client
After that, you will be able to boot your first thin client.
Server Actions
- Create a user Profile, i.e. internet-user
- Install Flash Plugin for Firefox
- Install Pessulus (sudo apt-get install pessulus)
- Install Dansguardian & Squid (sudo apt-get install dansguardian squid ssh)
- Edit Dansguardian acces denied page
(/etc/dansguardiuan/languages/ukenglish/template.html)
N.B. Dansguardian acces controls are in /etc/dansguardian/lists
–> modify with text editor to adjust web content filtering
file “exceptionsitelist” is very useful and effective to add entire sites
(i.e. hotmail.com for funny sexy mails)
If you need to adjust settings for the diskless clients (i.e. Display resolution, keyboard settings), you’ll need to edit the file “/opt/ltsp/i386/etc/lts.conf”
[default]
LOCALDEV = True
SOUND = True
NBD_SWAP = True
X_COLOR_DEPTH = 24
XKBLAYOUT = ch
XSERVER=auto
X_MODE_0 = 1280x1024
X_VERTREFRESH = 60
X_HORZSYNC = 60-75
LDM_AUTOLOGIN = True
LDM_USERNAME = User //only if you want Autologin features
LDM_PASSWORD = Pass
Run “ltsp-update-image” after saving!
Boot the diskless System via network (PXE-Boot, be sure to have plugged the “lan” into secondary NIC of server), login with the freshly created user. (i.e. internet-user)
Verify DHCP Settings
Have a quick look at /etc/ltsp/dhcp.conf :
- Be sure that the router IP Address distributed by the LTSP Server corresponds with your LTSP Setup. ( I had to change from 192.168.0.1 to 192.168.0.254)
Setup Profile
- Add Firefox to autostart (Preferences -> Session -> add -> firefox (as command)
- Adjust Desktop (Wallpaper, icons etc..)
- Remove Top Panel
- Remove Trash , Multiple Workspaces, Show Desktop from Bottom Panel
- Add Logout applet to Bottom Panel
- Run pessulus (or via System->Administration->Lockdown Editor)
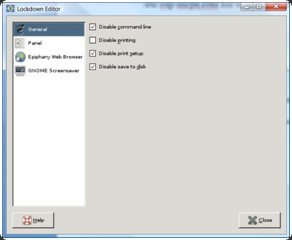
Fig. 4 Pessulus Lockdown Editor Configuration pages
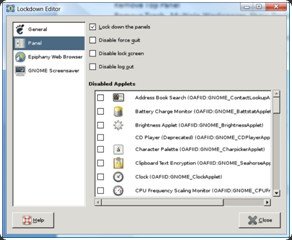
Fig. 5 Pessulus Lockdown Editor Configuration pages
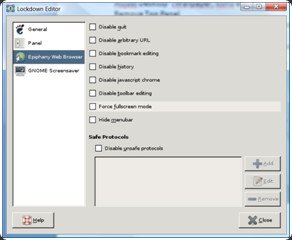
Fig. 6 Pessulus Lockdown Editor Configuration pages
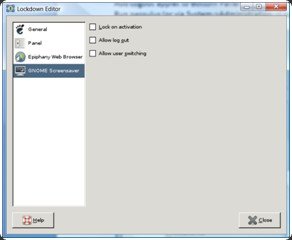
Fig. 7 Pessulus Lockdown Editor Configuration pages
- Open Firefox
- Install Publicfox extension & Openkiosk extension
!!! Set password for these extensions !!!
- Configure Publicfox like this (Menu Tools->Addons) :
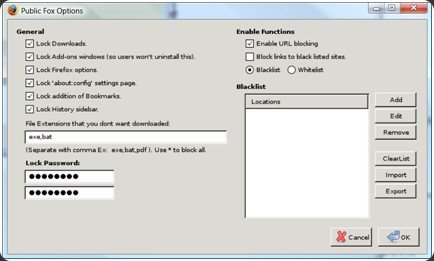
Fig. 8 PublicFox Config
- Configure OpenKiosk like this (Menu Tools -> OpenKiosk->admin) ,use admin as first password
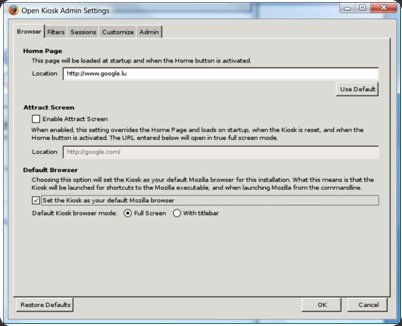
Fig. 9 Open Kiosk Configuration Page 1










Rezent Kommentare